📅 Posted 2021-10-15

Lately I’ve been looking into NAS (Network Attached Storage) for home so that I can access my files from any computer at home. I guess moving everything to “the cloud” would be an option but could get costly depending on how much data I want to shift and with the crippled Australian internet with really poor upload speeds (my top tier ‘best available’ connection caps out at 40mbps upload), maybe having a few files on a local store would be more practical.
So then I started to research pre-built options from the likes of Synology, QNAP and Asustor but it’s really hard to see the value of a weedy Celeron in a box with room for 2 drives for several hundred dollars.
I was considering options like the Synology DS220+ but you’re talking at least AUD $530 (at time of writing) for a 2 drive bay option that is powered by a dual core Intel Celeron J4025 CPU and 2GB of RAM. Not exactly amazing for the money. I’m sure it’s fine as a basic NAS but I really wanted a bit more.
For someone so into serverless computing (yes I know it’s not really serverless) building a server at home might seem a bit odd! I think a lot of the enjoyment is really in the research and build aspects of the project.
Building a home PC with regular off-the-shelf components would definitely bring a lot more grunt for the price, but I would question the amount of power such a machine might draw in everyday use.
What’s missing for the DIY option is the NAS software, but installing Ubuntu and configuring a few basic options to get things running should keep me out of trouble for a few hours. I know a pre-built NAS is easier to get set up and going and it would work for a lot of people who don’t have a huge amount of patience to set up and maintain such equipment.
I’m also pretty keen to run a few Docker images for other servery goodness like a Pi-hole for network wide ad and tracker blocking as well as the Unifi Controller from Ubiquiti. Who knows, I might get into running Home Assistant or other things too! The existing setup I’m ruinning on an old Lenovo Thinkpad X220 would be right at home if transferred onto my new mini server.
That means I can recycle the Thinkpad X220 for something else! The battery is pretty much gone but the screen and keyboard are fine and the dual core i5 hums along quite nicely.
Lastly, I’d like to dabble in some media transcoding, although initially my little home server would be used for music and then one day, video. Perhaps Plex would work well? Something to investigate later.
So, enter…
The plan
I spent a long time researching various low power CPU options and settled on a few things:
- The last 3 PCs I’ve built have Mini ITX and I like the small form factor and I felt like having something smallish should be easier to store with the rest of the network gear
- I’m interested in something with low power consumption, although I also don’t want to knee-cap it by building with an underperforming CPU
I came up with the following spec:
| Qty | Item | Description |
|---|---|---|
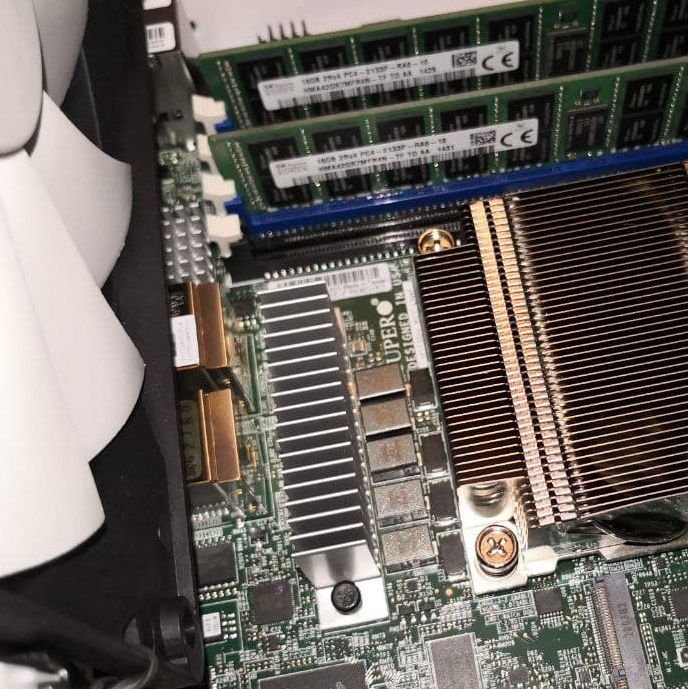
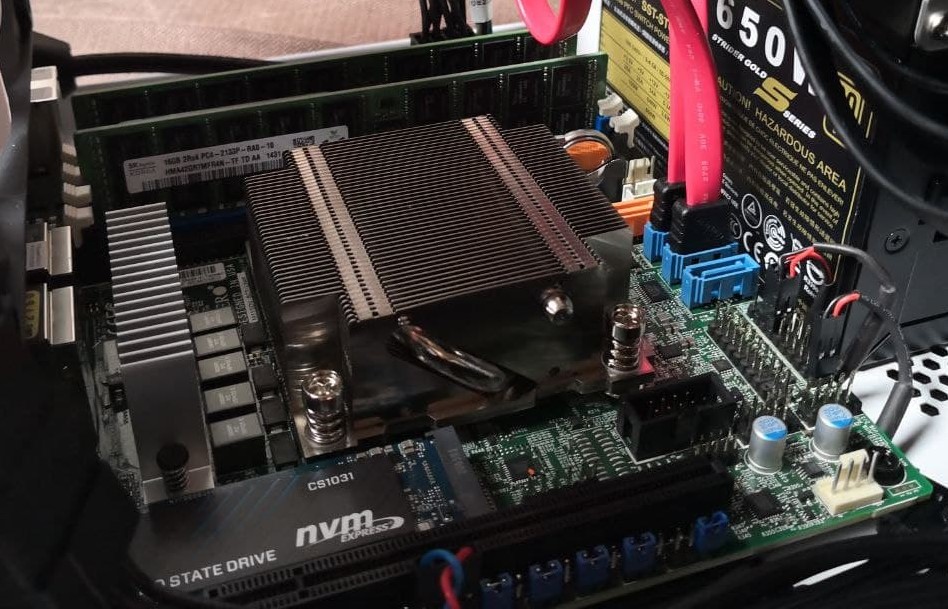
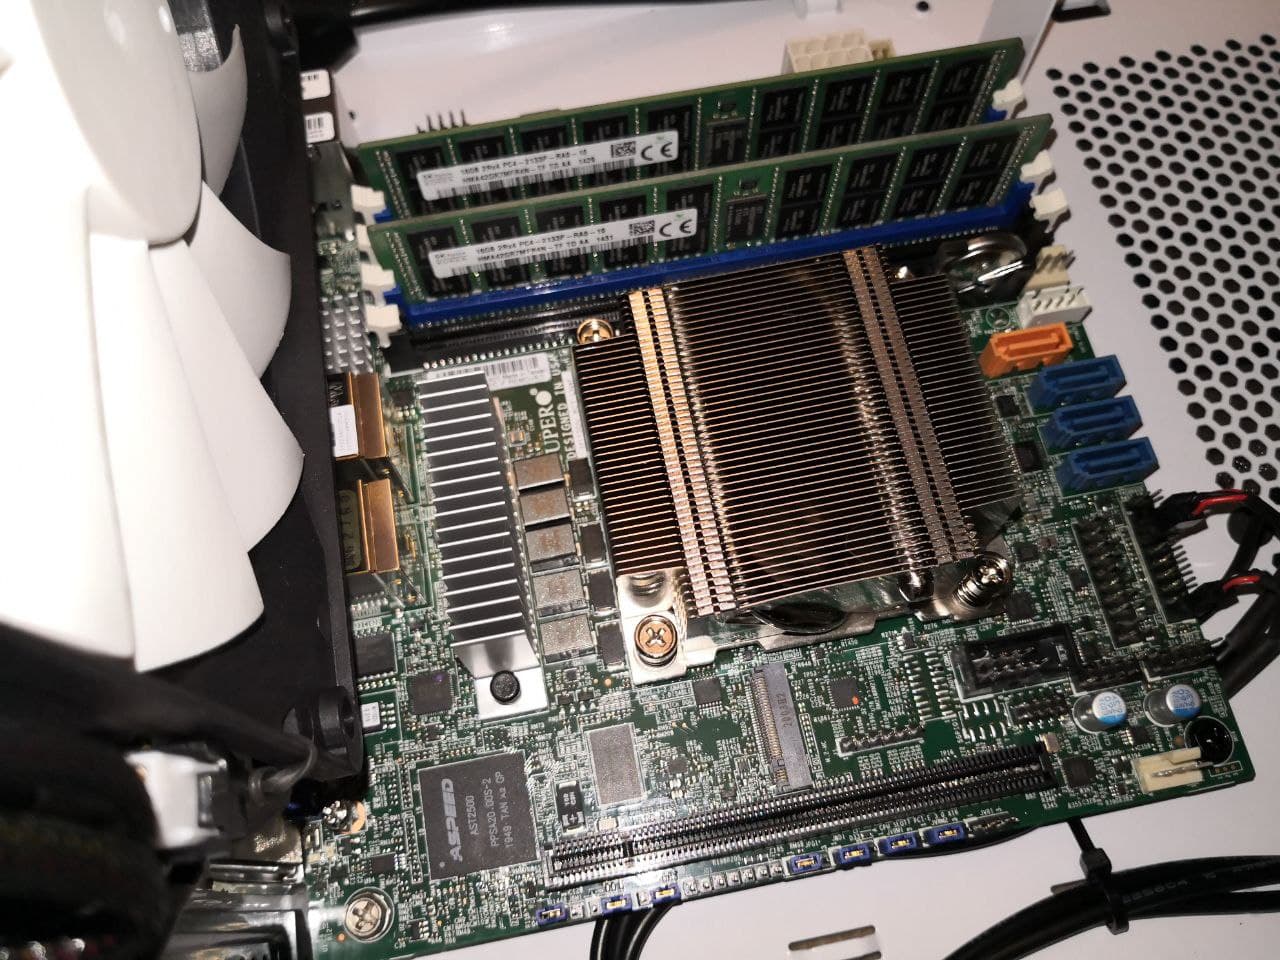
| 1 | SUPERMICRO MBD-M11SDV-8CT-LN4F-O Mini ITX Server Motherboard | The AMD EPYC 3201 CPU is soldered in, so no upgrades possible, but this board has a full size PCIe slot, 4 RAM slots, enough SATA ports and way more network ports than I’ll ever use. Or maybe I could assign one for each VM that I run? That would be interesting. |
| 2 | SK hynix 16GB 2Rx4 PC4-2133P DDR4 ECC REG RDIMM Server Memory HMA42GR7MFR4N-TF | I managed to pick up this RAM used, so that saved a ton of money. |
| 1 | PNY CS1031 M.2 NVMe SSD 256GB | Outside a laptop, I haven’t used a M.2 based NVMe for the boot drive but I reckon this little number will give the machine a huge boost for the OS. |
| 1 | Fractal Design Node 304 Mini ITX DTX Case White | White is a new one for me. I’d almost always go black for PC and tech hardware! So I decided for a bit of change this time. |
| 1 | SilverStone Strider Gold 650W Power Supply | A decent modular PSU that fits snugly into the Mini-ITX form factor case. |
| 2 | 8TB HDD WD Red Pro | Starting with 2 drives for this build. More can be added later! I previously had 2 x 3TB drives so this should cover all my storage needs as well as giving a bit of room to grow. |
In summary:
- 8 core / 8 threads AMD EPYC CPU (30W TDP)
- 32GB DDR4 ECC Reg RAM
- 2 x 8TB HDD
- 256GB NVMe OS drive
- Mini ITX case w/ 650W PSU
Cost (without the hard drives) was about AUD $1300, which is about double what a mid-level pre-built 2 bay NAS might cost, but this has so much more grunt. And something comparable in the pre-built NAS range would be thousands of dollars.
The CPU itself is really interesting, with the following spec from AMD:
AMD EPYC™ Embedded 3201
- CPU Cores: 8
- Threads: 8
- CPU Max Freq.: Up to 3.1GHz
- CPU Base Freq.: 1.5GHz
- TDP: 30W
- (More details at CPU-World)
8 cores for 30W? Hell yeah! 16 threads would have been nicer, but whatever.
To achieve this, AMD has capped the DDR4 memory frequency at 2133MHz, but that’s OK because it means I can save a few $$ by getting slightly lower spec RAM (but still registered ECC).
Is this going to use more power than the Synology DS220+? Absolutely. But it’s also going to be able to handle many more workloads I throw at it over the coming years.
Previously, on this show…
This will be my second ‘server grade’ Mini ITX build, with my previous effort being the following:
- Intel Xeon E3-1220L v2 w/ 17W TDP
- Intel® Server Board S1200KPR
- 16GB DDR3 ECC Unreg RAM (accidently bought registered RAM for this build last time - oops!)
- Lian Li PC-Q25B Mini ITX Case
This machine is happily sipping very little power as my father-in-law’s main PC. I think he’d like an internal optical drive though (the Lian Li case has no external drive bays) and having to use a USB soundcard is a bit trash (I guess it is a server board after all!).
Glad to see a quick CPU comparison of the Xeon E3-1220L v2 versus the Celeron J4025 (from a newer pre-built NAS) has the 7 year old Xeon coming out on top for performance (CPU Mark of 2845 vs 1633), although does generate more heat on full load (17W vs 10w TDP).
Waiting time
So I ordered the parts from 4 different vendors, which does mean paying a little more for shipping in some cases, but means that overall, the price is lower than getting everything from one place.
3 of the 4 vendors are in Australia and one (the motherboard - no decent options to source this board locally) was ordered from the US, so it will be interesting to see which part arrives first. Unfortunately, most of the parts are 100% essential so I wasn’t able to put it all together until they all arrived!
Turns out the order from the US arrived in the middle, with some local Aussie suppliers taking longer to deliver parts which were “in stock” on their websites. Delivery works in a mysterious way during the pandemic as I can imagine all of the courier companies are madly over engaged to deliver packages at this time. I wasn’t in a rush, thankfully.
Here’s all the boxes ready for assembly:
The build
Motherboard & CPU
With no need to insert the CPU (no bent pins today!) or mount a CPU cooler, this is a really easy set up to put together. It’s a lot like adult Lego in a way, with most of the enjoyment sourced from the act of putting the parts together rather than using the completed machine. It still freaks me out in motherboards for ages now that the pins are on the board rather than the CPU. But I guess I grew up in a time where almost all home PC CPUs were socketed with lots of little pins!
Strangely, Supermicro has chosen not to put any 10 Gb Ethernet ports which are provided natively with the EPYC CPU, but this is likely due to the space 10 Gb ports require on the board. Still, I have nothing which can do 10 Gb but if I was really desperate, I could just get a PCIe card anyway.
Interesting that Supermicro has also gone with a 8 pin power connector - so there is no ATX power socket on the board! I guess it doesn’t draw much power (and doesn’t have a lot of room to add extra cards) so doesn’t need all those extra wires anyway. I would have liked more SATA ports, but 4 should be enough as I don’t think I’ll ever run more than 4 drives in this machine. The case has room for 6, so 4 would fit quite nicely.
The CPU cooler itself is super low profile and could benefit from more height. It doesn’t come with a fan and instead relies on general airflow within the case. We’ll see how it goes by monitoring temperatures but I suspect the airflow of the case is pretty good and this won’t need adjusting. No doubt Supermicro went for a low cooler to fit into 1U cases, which they also sell. I don’t like such server cases because they’re usually hell loud with tiny 40mm fans and an overall ‘flat’ profile which is not very useful outside of a real rack.
At the moment the CPU is reporting 54’C which is a little hotter than I would have expected, for a machine that’s just serving up DNS requests, managing the network and storing some files.
I’m really enjoying the iKVM capability on this motherboard: I was able to remotely install a copy of Ubuntu all without using a screen or keyboard directly connected to the server. Having the ability to jump on the computer without installing something like VNC - and even access the BIOS as the machine is booting - from a simple web browser on my network was far more useful that I had imagined. I was planning on turning off the management interface but it seems pretty good!
Finally, I did experience some issues for warm reboots not working (no POST!) but a quick email to Supermicro followed by a BIOS update to v1.0c (the board had 1.0b from the factory) resolved this issue entirely. Phew!
The Case
The 140mm exhaust fan at the back is both quiet but also has a 5/7/12v controller which is integrated with the dual 92mm intake fans at the frontI was pleasantly surprised by the overall quality of the Fractal Design Node 304 Mini ITX case and I opted for a white colour for a change. The quality of the paint finish is excellent, there are no sharp edges and the layout is quite flexible with room for up to 6 x 3.5" drives. I’ll be starting with 2 but it’s nice to know there is room to grow.
If you like computers that look like fridges, this is a case for you!
A welcome inclusion in the bag of screws is a little adapter to put the motherboard mounts into the case - I mean, they could’ve probably just assembled this part already from the factory since there is only 1 size that can fit in the case - but it’s a nice inclusion none-the-less.
I’m not convinced by the plastic washers on the thumbscrews - most of them have been crushed in the process of tightening up the screws - so I would probably ditch these at some stage. Or they might just fall off next time I open the case anyway.
Here’s the whole thing set up (sans outer cover):
The rest
I’ve heard the motherboard is a bit picky when it comes to NVMe drives, so fingers crossed the cheapie PNY brand 256GB drive I selected is OK. I’ve heard if it does cause issues, it will be after a few days / up to 2 weeks. So we’ll have to see about that after some time. There is a list of tested/approved devices on the Supermicro website, but I imagine they are probably ‘server’ grade with a price to match!
The WD NAS hard drives are noisier than I’d like, but I’m really not used to having them running all the time. Perhaps opting for a 5400 rpm drive (with lower performance) over the 7200 rpm drives I picked up would be advisable if noise or vibration is an issue for you. I might also look at the side panels of the case to see if I can reduce any amount of vibration as the grille for the space where the video card would go does seem a little loose.
The SilverStone 650W power supply was chosen for being fairly efficient (with a ‘Gold’ 80 rating) but also because it’s short (140mm only) and has modular sockets. This keeps the case a bit neater but also opens the option to reduce the size of the 24pin ATX cable since this board only uses 4 wires from this connector (mainly for switching the power on, standby power and ‘good’ power signals). Removing all those extra snake-like cables makes a huge difference in a small case. The only concern I have about the SilverStone Strider Gold 650W power supply is that the wires are all black! Looks good as a contrast against the white case (not that you can really see inside anyway) but will make checking any mods here a bit more tedious.
Power Consumption
TBC. Will need to get my meter out, which involves shutting down the machine so that it can be inserted between the machine and the wall socket. But from some back-of-the-envelope calculations using a clamp meter linked to my solar inverter, I suspect it’s under 50w when idle. It’s definitely going to be more than the Thinkpad X220 that it’s replacing, but that’s expected given the grade of components, addition of hard drives and much more capable CPU.
Things installed so far
I’ve got a few different apps running now, including:
- Pi-hole so that I can say goodbye to most ads/tracking - not Dockerised yet, but I think I’ll move it over shortly
- Ubiquiti’s Unifi Controller - Dockerised, easier than installing natively actually
- Samba for file sharing with Windows machines
Beyond this, I’d like to explore some other things like Home Assistant or Plex when I get some more opportunity to mess around with it.
It could also form the basis for a local server instance to replicate the Koi CMS environment when I’m developing locally outside of AWS.
I’d also like to run some email backups, probably on some sort of cron job so I can set and forget.
Still, pretty low loads overall for the moment.
Wrapping up
It’s going to take a bit of time to get used to having spinning disks in the house on 24/7 and I’ve still got plenty of headroom to make the most of the new hardware, but so far the setup has been pretty straightforward with only the occasional “omg Google save me what is the Linux command for X” style search.
Recommended!
Like this post? Subscribe to my RSS Feed or


Comments are closed