📅 Posted 2016-01-29
It’s been a little while since I’ve blogged. Time to get back into it again. Amazon has recently released their AWS Certificate Manager service which makes it really easy to add HTTPS (TLS) to sites hosted in AWS.
This is a bit of a game changer. Sure. I’ve bought the odd TLS/SSL certificate in the past, but it’s not something I’d do everyday. I think things are really changing. There is word of browsers identifying non-HTTPS websites as “insecure” and also Google and the link boosting rankings for sites that are deployed under HTTPS. Back in the day, there was a performance hit to use HTTPS. Now, that doesn’t play a part in the user experience.
Previously, you had to buy a certificate from a vendor (of which there are too many to choose from) and then carefully apply the certificate chain in obscure certificate formats to your ELB, CloudFront distribution or webserver directly (please, no). The chain had to include any intermediate certificate otherwise things like curl would not be too happy about broken chains.
To get it listed in AWS you had to dive into the CLI tools and install the certificate and hope it made its merry way into the right place.
Then you had to configure the certificate in the AWS service you were using: CloudFront or an ELB.
Now, that has all changed.
The process is so easy I don’t see any reason why every site or app hosted in AWS shouldn’t use HTTPS. Well maybe if it’s not a HTTP-compatible service, but that’s all.
Here’s what’s involved.
- You can go directly to AWS Certificate Manager but what I did was start with CloudFront
- Create a new distribution
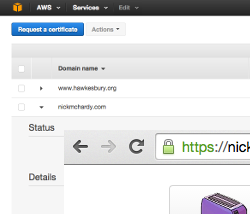
- Click on Custom SSL Certificate. Click on the “Request an ACM Certificate” button to create a certificate
- Define the domain name you wish to secure. I had more luck with single-domains rather than wildcard certificates, although both are supported
- Approve the email you receive (you are the owner of the domain, right?)
- Go back to CloudFront and hit the refresh button and the new certificate is displayed, so select it
- Carry on with the rest of your CDN configuration
That’s it. The longest part is waiting for CloudFront to deploy out the new distribution. The rest is so easy.
Oh, what does it cost?
The certificates are free. CloudFront and ELB costs are as per before. Win. I can see this really shaking up the SSL marketplace, especially with the push for “HTTPS ALL THE THINGS” which I fully support. Why not?
There are a few more small steps to do in Route 53 (or your friendly DNS management application) to connect your domain via an A record (with alias) to the CloudFront distribution.
Addendum: 2-Feb-2016
Turns out you can only currently assign the certificate to an ELB in the US East (N. Virginia) region. But you can assign it to CloudFront serving any origin in any region.
Side note: to make CloudFront work nicely in Drupal and other dynamic CMS-y sites, you basically need to turn off all of the caching, enable passing thru of all HTTP request types including POST, enable pass-thru of all headers and enable cookies. It also helps to configure Drupal’s $base_url to the actual URL of the site including ‘https’ to ensure you get the green lock from having all resources delivered via HTTPS.
Like this post? Subscribe to my RSS Feed ![]() or
or ![]() Buy me a coffee
Buy me a coffee
Comments are closed